
Application Note for QuNect ODBC for QuickBase
Getting Started
After installing QuNect ODBC for QuickBase you should enter your Quickbase username and password or user token for the four Data Sources that were created by the installation process. Click on the Start Menu and type ODBC. This will bring up shortcuts to the two ODBC Data Source Administrator control panels. One is for 32 bit applications and the other is for 64 bit applications. If you are running a 64 bit version of Windows and you are using a 32 bit application like Excel or Access then you need to use the 32 bit ODBC Data Source Administrator. If you are running a 64 bit version of Windows and you are using a 64 bit application like SQL Server then you need to use the 64 bit ODBC Data Source Administrator. If you are running a 32 bit version of Windows then you only have the 32 bit ODBC Data Source Administrator.
You'll end up at a dialog like this:
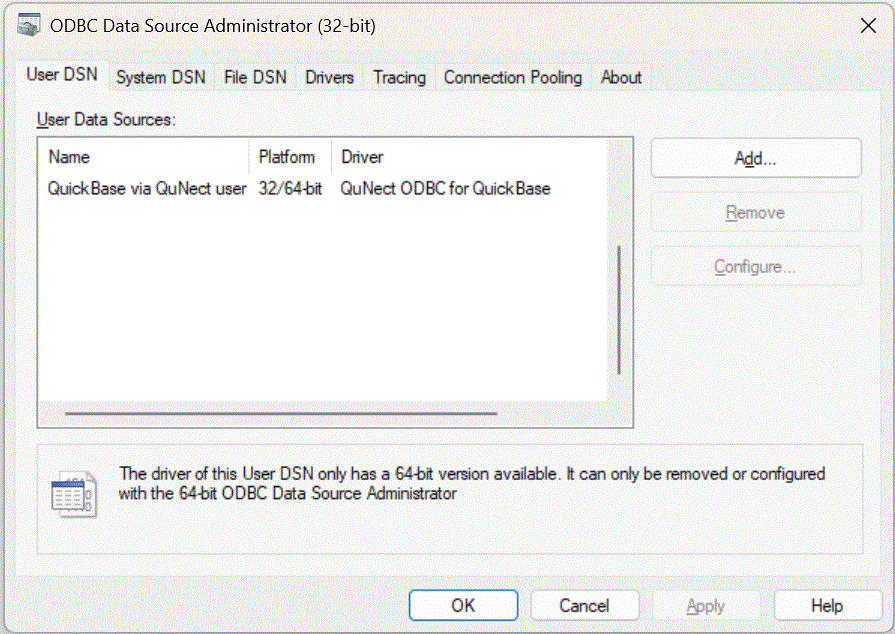
Double click on QuickBase via QuNect user. You'll see the following dialog pop up.
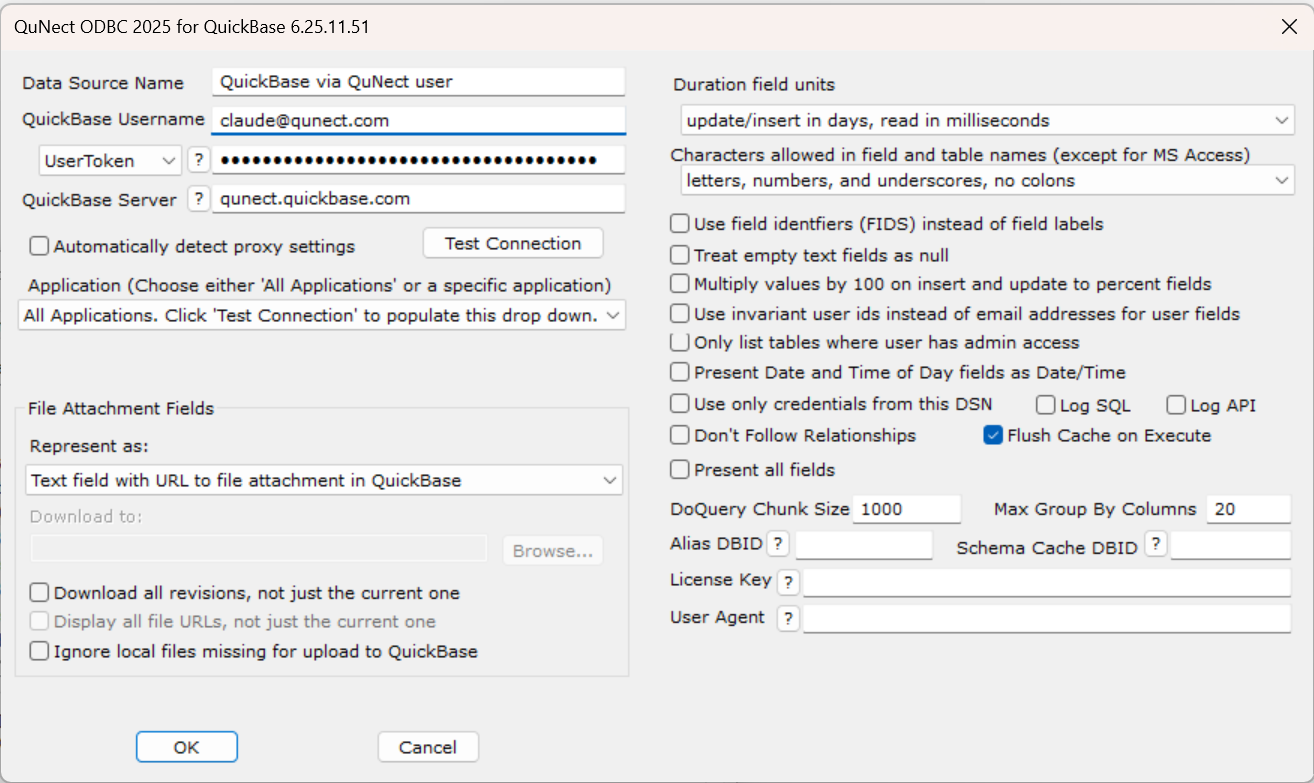
Enter your Quickbase username and password or user token. You will have a Unique URL like https://mycompany.quickbase.com you need to enter server name under Quickbase Server. Do not leave this blank or enter www.quickbase.com!.
If you're using a password instead of a user token then you'll need to enter an application token. You can use a preexisitng QuNect application token by reading the instructions on how to use an existing application token. If you don't have a preexisting application token you can create your own application token. Please read the section entitled Create and assign an application token on the Quickbase help page entitled Application Tokens.
If your LAN (local area network) environment requires the use of a proxy server then you should check the box Automatically detect proxy settings. You can leave this box unchecked, but if you find that QuNect ODBC for QuickBase returns an error message [QuNect][Quickbase]A connection with the server could not be established 12029 then checking this box will probably resolve this error. If you do not need a proxy server to connect to the Internet checking this box will introduce a fifteen second delay for every connection that is made to Quickbase. So only check this box if you need to. Click OK to save this information. Your User DSN is now configured.
Now let's move on to your System DSN. Back in the ODBC Data Source Administrator dialog, click on the System DSN tab. Then double click on QuickBase via QuNect 32 bit. Enter the same information as above. Click OK to save this information. Congratulations! Your QuickBase via QuNect 32 bit DSN is fully configured. Now click on OK to close the ODBC Data Source Administrator dialog.
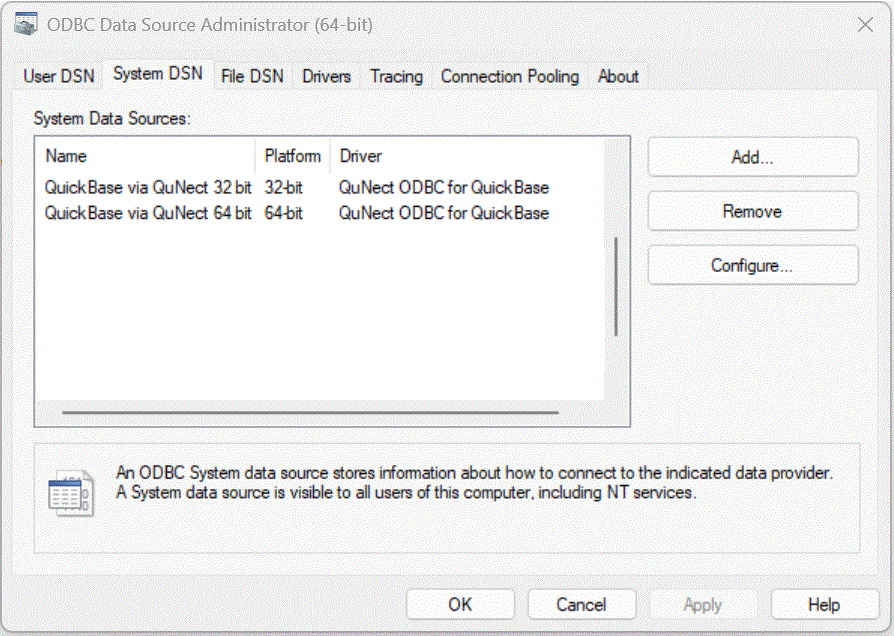
Now click on the Start Menu and type ODBC. Then look for 64 bit ODBC Admin. It will only be there on systems with a Windows 64 bit operating system. After clicking on 64 bit ODBC Admin, repeat the steps above for the QuickBase via QuNect 64 bit DSN. Your user DSN should already be configured from the steps above.